
Reflexology is a therapy that primarily targets the feet with the intent of healing the person as a whole and not simply address perceived symptoms.
The focus on the foot (or hand) as the main gateway to getting well can be traced to a number of research studies. Based on research, the anatomy of the person can be traced to the sole of the foot. For example, the heart and the rest of the organs have representations on the foot of the person.
It is also believed that the energy flow in the body that goes into every cell follows a path and this connects a number of organs and glands with pressure points present on the feet and the hands.
And if the person feels pain, that suggests the energy flow has been blocked, or perhaps a disease is present or pending. When the pressure points on the feet are massaged, it helps to clear the energy blockage, thus healing that part of the body.
Beginning a Reflexology Treatment
Before beginning any reflexology treatment, it is important to relax. Use two of these relaxation massages before commencing a reflex treatment:
- Gentle Massage – Massage the foot all over slowly but firmly to loosen it up, beginning at the toes and moving down towards the heel for about 30 seconds
- Spinal Twist – Using both hands, hold onto the spine area with the palm of the hands – fingers on top of the foot and thumbs on bottom of the foot. Slowly and gently twist/wring the hands away from each other in order to gently twist the spine area on the foot. This is a relaxation exercise. Loosely wring one way and the other for approximately 30 seconds total.
- Stroking – This technique stimulates the blood vessels in your feet and promotes gentle heat. Hold the foot in your hands and begin to massage the top surface of the foot. Use your thumbs in a slow, firm stroking motion, starting at the toes and moving up to the ankle. Once you have reached the ankle follow the same line back to the toes. Make sure you apply lighter pressure towards the toes than the ankle.
- Ankle Rotation – Firstly gentle move the ankle side to side to loosen the ankle joint. Hold the heel of the foot in a cupping motion and hold the ball of the foot with the other hand. Rotate the foot clockwise and counter-clockwise three or four times to relax the foot from the ankle joint, reversing the directions will calm and destress your senses.
- Pivoting – Gently hold the foot in your hand and use the other hand to massage the sole of the foot with your thumb. Begin with the area directly below the large toe and slowly move to the other toes. After initial pressure, roll the thumb back and forth. It may be seen as wiggling the thumb. Release pressure, and move.
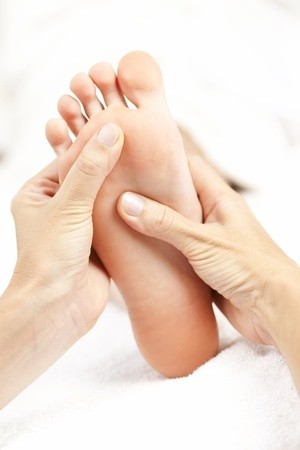
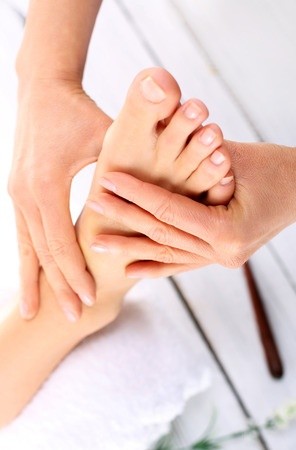
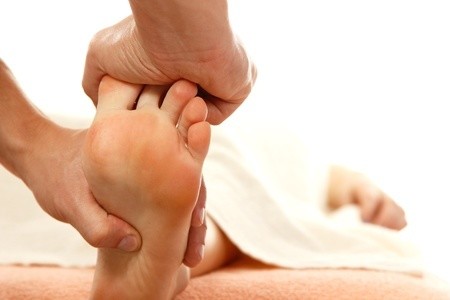
How to Do a Simple Reflexology Massage
- Hold the foot that you want to massage, start the massaging process by using the thumb. Just apply pressure to the sole of the foot. (See the reflexology massage techniques below) In applying pressure to that area, make sure that you are firm but not using too much force. The rule here is to start at the toes and work your way towards the heel.
- Now move to the top of the foot. Make sure that you cover the whole foot at least twice, including the ankle.
- If there is any pain, apply pressure to that area/point for at least 30 seconds. Repeat this process until the soreness or pain is gone.
Reflexology Massage Techniques
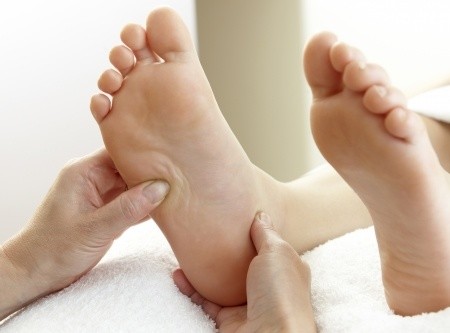
Slide and Press
Place both thumbs on the heel and slide each thumb from the center of the sole to the edge of the foot.
Alternate the thumbs by using the right and then the left as you work up the foot towards the toes.
Loosening the Foot with a Back and Forth Movement
To accomplish this, first place the palms of the hands on either side of the foot with the fingers on the top of the foot. Ensure to keep the hands relaxed.
Gently push the foot forward with your left hand and pull the foot back with your right hand. Continue with this movement, alternating between pushing and pulling the foot back and forth.
Keep the hands relaxed but firm, and in contact with the foot. Repeat about five times until you feel that the foot is relaxed. Then repeat the process on the other foot. This movement helps to release tension.
Toe Rotation
In this movement we have the equivalent effect of rotating the neck, and this accordingly helps to loosen up the neck area. Nervous tension is located in the neck area and correspondingly the two big toes may be very stiff.

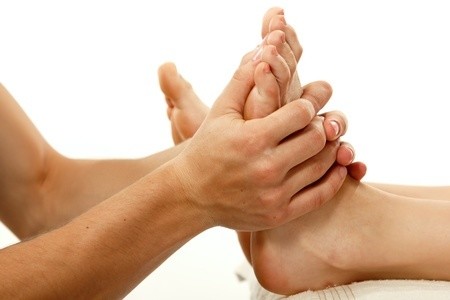
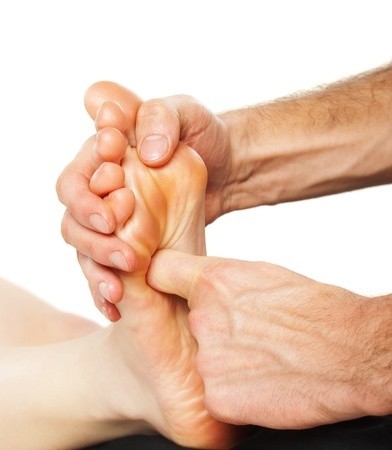
Basic Thumb Technique
In reflexology you use your thumbs mainly to work the reflexes on the soles, and sometimes the sides, of the feet. Working with the first joint of your thumb, you “walk†forward along the reflex by successively bending and unbending the joint a little way.
It is the inside or medial edge of the thumb that makes contact with the foot, not the tip or the ball (the part that touches the table if you put your hand down flat).
When the thumb is at the correct angle, the joint is not bent too far, allowing greater accuracy and smoothness of technique, as shown.
Bending the joint over too far (below) not only strains it but also means that the person you are working on may feel your nail. The fingers of the “working†hand wrap around the top of the foot to provide leverage.

Index Finger Technique
The index finger comes into play when you are working on the top and side of the foot. Once again, you make contact with the inside or medial edge of the finger, bending the first joint slightly to “walk†or creep forward. This time, the thumb gives leverage from the other side of the foot and pushes the metatarsal head forward, to make working the top of the foot easier.
Practice the movement until you can execute it smoothly, keeping your pressure steady. Try “walking†over a painful reflex in one direction with your left index finger, then come back over it with your right.
As with the thumb, when you use your index finger correctly the joint is only slightly bent and the inside edge of the finger works the reflex, as shown . If you flex the finger too steeply and use the fingertip, as below, much of your contact with the skin is lost and you risk digging your nail into the person receiving treatment.
Hooking
Support the foot well in your “holding†hand and place the thumb of your “working†hand on a reflex area. Now hook the thumb in and back up sharply, to one side (in this instance, towards the outside).
This technique is useful for homing in on a particularly small reflex and for working on parts of the foot where the skin is tough, such as the heel. Like a bee inserting a sting, you push your thumb into the reflex, then pull it back. The leverage of the fingers is crucial here, as the technique demands great precision.
Reflex Rotation
Specifically designed to help “work out†a painful reflex, this technique is used on the reflexes to the upper abdominal area of both feet (i.e. between the Waist Line and Diaphragm Line). You should apply it if you come across a particularly tender area, keeping your thumb in position while you rotate the foot around it, as shown.
After a few minutes of reflex rotation, you will find that the pain has diminished considerably. Go gently, being careful to avoid digging your thumbnail in.
Press your “working†thumb gently onto the reflex. Now use the “holding†hand to rotate the upper foot around the thumb, clockwise then anti-clockwise.
The precise reactions which take place when the foot is massaged are not fully understood, although it is accepted that the treatment has a very positive effect on the nervous system and on blood circulation. The improvement to the blood circulation therefore has a beneficial effect on the vital transportation of nutrients to the tissues, and the removal from those tissues of waste products.
 Fill out the form below to sign up to our free natural health and healing newsletter and stay up to date on our latest articles about holistic healing therapies and effective home remedies for common ailments. As a thank you for joining our newsletter, we’ll also send you
Love your article! One of my favorite treats is having an a reflexology massage. Unfortunately is hard to massage yourself using this technique.
Thank you for this article! Could you recommend a good book on the subject? I’m very interested in learning more.
My 3 favorite Reflexology books are by Mildred Carter – Body Reflexology, Hand Reflexology and Foot Reflexology. She is one of the greats of this field and if you’re interested in this healing modality, she is the one to begin with. 🙂