Making crafts is a fun way to celebrate Thanksgiving. You may not be too keen on the idea if you think crafts involve a lot of complication and mess, but there are easy Thanksgiving crafts you can do with your kids. You can even use some of them as table centerpieces. Here are some ideas for some fun Thanksgiving crafts to do with your kids – and quite a few of them are even super easy!
Fun and Creative Crafts for Thanksgiving
A New Take on the Hand-Print Turkey
Remember tracing your hand and coloring in the palm and fingers to make a turkey? Here’s another idea that takes the principle of the hand-print turkey into new territory.
Materials:
- Air-dry, paintable clay of any color (white, beige, brown or neutral earth clay is best)
- Acrylic craft paints
- Decorative options: small googly eyes, craft feathers, beads, etc.
- White craft glue or hot glue gun
Instructions:
Take a piece of clay about the size of an orange. Work it until it is soft. Place the clay on a hard, wax paper-covered surface. Using your fingertips or a rolling pin, flatten the clay into a circle, oblong, or random shape.
Have the child press his or her hand into the clay to make a clear but not terribly deep hand print. Allow clay to dry.
Once dry, use paint and the accessories to decorate the turkey – glue on googly eyes, feathers, beads, and so forth. You could put a border of beads or feathers around the edge or on the turkey itself.
Thanksgiving Craft: Turkey
Turkeys are popular at Thanksgiving time, both as the main dish and as decorations. There are many different ways to create nice turkey that may become a tradition for decorating for years to come.
The simplest turkey to make is by tracing around a hand, fingers spread. The thumb becomes the head, the other fingers the feathers and the palm is the body of the turkey. Color the turkey, add details like eyes and cut it out. They can be hung on the walls, scattered around the table or used to create a mobile.
Paper Mache’ Turkey
Another fun project is a paper mache’ turkey. Prepare the paper mache’ paste. The two most popular methods are:
1. Non-cooked – 3 part white glue to 1 part water
2. Cooked – 1 part flour to 5 parts water, boil about 3 minutes and let cool
Blow up a large balloon and cover with newspaper strips that have been covered in the paste. Once dry, prime the body and paint brown. Cut out colorful feathers, feet, and a head and attach them to the turkey body.
Paper Bag Turkey
If you don’t want the mess of a paper mache’ turkey, you can make one out of a paper bag. Stuff the bag with newspaper or plastic bags and shape the body. You can decorate it like the paper mache’ turkey, with feathers, feet and a head.
Bottle Turkey
Another turkey craft that could also be used for a game is to make 2-liter bottle turkeys. Put a little bit of sand in the bottom to keep them from falling over. Paint the bottles brown and then decorate them. After you have ten of them, you could let the kids go bowling for turkeys.
Turkey Wreath
To create a turkey wreath, cut out a circle of cardboard with the center cut out, leaving about a two-inch ring. Cut strips of red, orange and yellow construction paper an inch wide by about 4 inches long. Glue the ends together to create rings, and arrange them on the wreath for the feathers. Cut out a head and feet and attach at the bottom of the wreath.
Tabletop Teepee
This will look good on the table or anywhere you want to display it.
Materials:
- Construction paper (tan, light brown, grey, or white)
- 3-5 twigs, about 12 inches in length
- Markers, paints, stickers of Native American symbols or designs, and/or crayons
- Natural twine
- Hot glue
Gather the twigs into a bunch and tie them at the top with the twine. Arrange the twigs into a triangular shape. Use the hot glue gun to secure the twigs at the tied area once you’ve reached the desired shape.
Decorate the construction paper on one side using the paints, stickers, etc. Wrap the construction paper around the twigs, decorated side out. Secure with hot glue.
Paper Mache Napkin Rings
This is a fun way to personalize everyone’s place at the table!
Materials:
- Warm water
- White flour
- Newspaper
- Scissors
- Cardboard tubes (such as paper towel tubes or toilet paper tubes)
- Acrylic craft paint
- Decoupage medium or white glue thinned with water (equal amounts water and glue)
Instructions:
Measure the water and flour in a ratio of 2 to 1; 1 cup water for every half a cup of flour, for example. Put the desired amount of warm water in a bowl, then gradually whisk in the flour until no lumps remain. Add more water or flour as needed to get a thick, glue-like consistency.
Cut or tear newspaper into half-inch-wide strips. Cut the cardboard tubes into the number and size of napkin rings you want.
Dip strips of newspaper into the flour mixture, making sure to coat the whole strip. Lightly run your fingers down the strip of newspaper to remove any excess. Cover each cardboard ring with the soaked strips, smoothing as you go.
Once dry, the napkin rings can be painted as desired. You could also use Thanksgiving stickers. Once the paint has dried, coat the entire ring with a layer of decoupage medium for a clear, protective coating.
Indian Headdress
The most colorful and creative Thanksgiving craft you and your kids can engage in is making Indian headdresses. Whether you prefer one feather, or the full regalia – they are beautiful and fun to wear as well.
Let’s take a look at how to make a few of these headdresses. Basically, it’s one-stop shopping at your local craft store. Purchase a plain headband; then choose a wide variety of colored feathers, long, short and in-between. In addition you will need some gold sparkles or stars or any color your kids choose.
Next, have your kids decorate the headbands with the sparkles using glue. Then take the feathers and one by one, glue each feather to the inside side of the band. Start with the first row of short feathers, then the next row of medium sized feathers glued to the first, and so on, until the last row contains the longest feathers. Mix up the colored feathers and place the band around the forehead and Voila! You have a superb looking Indian headdress.
Perhaps one of your children doesn’t want to be the Indian chief, but an Indian girl. In that case, one feather on a colorful band made by your daughter will be just as attractive.
In addition, there are some Indian headdresses which call for a feather placed from the bottom of the headband to the chin, denoting a specific tribe. Your kids may want to name their tribe as well by choosing a logo which they can also place on the headband.
Indian headdresses can be as simple or as ornate as you wish. There is no right or wrong way to make a headdress. The only requirement is that the kids have fun and you take lots of pictures for your scrapbook or family album. Oh, and don’t forget to tell the kids they have to make up an Indian dance as well so you can capture it on video to view for years to come.
Turkey Cups
With the Thanksgiving family dinner coming soon, you’ll probably have a house full of kids, buy small kid-sized plastic cups and craft markers. Give each kid a cup and let them write their name on it and decorate it.
Turkey Placemats
Give your kids colored construction paper and let them make turkeys. After they are finished, mount each turkey on a separate sheet of construction paper, then laminate it. Now they have their own special turkey placemat.
Pinecone Turkey
Gather pine cones, then cut out colorful turkey feathers from colored construction paper. Use red felt to cut out the turkey’s comb. Glue your Thanksgiving turkey together, inserting the feathers in between the pine cone leaves.
Thanksgiving Flower Pots
Buy the smallest red clay pots you can find at your local gardening store (these are super cheap), a bag of potting soil, and packages of various flowers, vegetables, or herb seeds. Let your kids write the name of the seed on the outside of the pot with a magic marker.
Next, have them pour potting soil in each pot and plant the seeds. When the seeds begin sprouting in a few weeks, let your kids take their Thanksgiving pots to the local nursing home and give them away as Thanksgiving gifts to the patients.
Thanksgiving Napkin Rings
A nice touch for any Thanksgiving dinner table is handcrafted napkin rings. They are relatively simple to make and something that the kids could easily do to help. It could be a great project for children to work on while the food is being prepared.
First, you need to decide which napkins you want to use; cloth or paper napkins. Roll the napkin to the size you want, allowing a little overlap for the ring to hold the napkin. To make the ring itself, either purchase them or create your own by cutting toilet paper rolls into the desired size. The cardboard rolls work especially well for napkin rings that stand upright, instead of lying beside the silverware. Then the fun starts. It’s time to decorating the napkin rings. There are many different things you can use including:
- Stickers – Stickers are the quickest and easiest way to decorate the rings, especially for younger kids. There are many delightful holiday stickers available. The hardest part will be deciding which ones to use.
- Paper Turkey – By gluing a simple turkey body to the ring and adding a few colorful feathers to the inside of the ring, you can create a delightful turkey napkin ring.
- Indian Headband – To create a simple Indian headband napkin holder, use brown construction paper strips to make the rings and then add colorful feathers.
- Pilgrim Buckle – Traditionally, pictures of Pilgrims show a wide black belt with a buckle (also found on their hats). This is easy to make into a napkin ring. Use black strips of paper for the “belt” that makes the ring. Then cut a square, with the center cut out, from yellow paper that is a bit wider than the strip for the buckle and paste to the Pilgrims belt.
- Pilgrim Hats – Cutting out a simple Pilgrim hat or bonnet silhouette could make for cute napkin ring designs. If you want a 3D version of the black hat with the buckle, you could make the center of the hat from a toilet paper roll adding a brim around the bottom. Next, glue on a buckle made out of yellow paper and put the napkin in so it stands upright.
- 3D Turkey – To make a 3D turkey, make the body of the turkey from sections of a toilet paper roll, cut about an inch wide. Glue on the head and feet in the front and tail feathers in the back to complete the turkey.
- Fall Foliage – Cut out some leaf shapes in different fall colors. Glue them all the way around the napkin ring, overlapping them slightly.
The possibilities to create Thanksgiving napkin rings are endless, limited only by your own imagination. There are many variations that could be created for fun and funky or lovely and elegant table accents.
Thanksgiving Necklaces, Bracelets
One trip to your local craft store is all that is needed to begin the process of creating necklaces and bracelets at home. Choose a leather cord and a variety of beads in all shapes, sizes, and colors.  Then put the cord through each bead until you have the desired look. Follow this same process for both necklace and bracelet.
In the old days, shoelaces were used. You can do the same. Choose black or white shoelaces, which are easier to push through the hole in the beads, and tie a knot at both ends and you have a lovely necklace or bracelet.
Perhaps your kids would like to use some of your costume jewelry instead of beads. If you have several loop type earrings, you can make a lovely bracelet from those as well.
If your kids would like to make “sweet†necklaces and bracelets, they can use lifesavers which come individually packaged. Pick up the variety bag, and the kids can have a great time making candy necklaces and bracelets as well.
Here’s another fun idea. How about using elbow pasta to make a necklace and bracelet? The kids can use sharpie pens in different colors and really make unique and colorful jewelry. Of course, there is the traditional popcorn bracelet and necklace but how about using caramel popcorn to add a bit more color?
Thanksgiving Hair Bows
Hair bows have always been an attractive accessory to wear on any occasion. Thanksgiving is no exception. If you love making hair bows, here are a few suggestions for Thanksgiving hair bows which may be helpful in creating a unique and beautiful accessory for you and your daughter to wear on this special day.
Depending upon the outfit you are wearing on Thanksgiving, you can choose wide ribbons in the following colors: white, orange, or ivory. Black would be more appropriate for an adult. Choose satin ribbons since they are classic and elegant as well.
Next, decide what ornament you wish to place in the center of the bow. For Thanksgiving, you may want to choose one of the following: autumn leaves, a cornucopia, or a large sunflower. Next, tie the satin ribbon into a large bow. Find another ribbon of lesser width to place under the centerpiece of your choice. For example, if you are wearing a large sunflower, you may want to buy light brown ribbon and cut two pieces, make an X shape and glue or staple it to the center of the satin ribbon. On top of the brown ribbon, the large sunflower would be glued.
Depending upon the centerpiece you choose for your satin ribbon, you can choose among a variety of different color ribbons to highlight the piece. For a cornucopia, you can add red, green or whatever enhances the piece. Use a hair clip to attach the bow to your hair or that of your daughter.
Here’s another suggestion. You can decorate your Thanksgiving table by placing the bows at the bottom of the tablecloth and spacing them about 3 inches apart all around. If you have a particular color scheme, you can make hair bows that reflect the colors in your dining room or mix and match them to your table wear. Thanksgiving is not only a time for thanks, but creating an elegant look to your table will make it more special. Don’t forget to take pictures for your scrapbook, too!
Hair bows have been utilized for everyday wear, evening wear, and exotic wear. No matter what the color, it adds a touch of class to anyone’s entire outfit. This Thanksgiving, check out the satin bows at your craft store, along with centerpieces they have on hand. You and your daughter will have a great time creating Thanksgiving hair bows.
Cornucopia Centerpiece
One of the most recognizable symbols of Thanksgiving is a cornucopia, or horn of plenty. It represents a bountiful harvest. It can make a lovely centerpiece on any holiday table. There are many different ways you could make a cornucopia, using different materials, many of which you can find around your home.
By using a wicker basket shaped like a horn, it is quite easy to do a basic cornucopia. Most craft stores carry them, usually in early fall, if not year round. Once you’ve selected a lovely basket, you can either fill it with artificial or real fruit and vegetables. If you chose to use real produce, it’s probably best to wait to fill the basket the day of your dinner so it doesn’t spoil before dinner. Some fall leaves scattered around the cornucipia are a nice finishing touch.
If the children want to make their own cornucopia, they could make it out of paper. There are many patterns online for adorable paper cornucopias. Have the children glue the horn to a green piece of paper and arrange the fruit anyway they want, gluing them in place. They could even be covered in plastic and used as placemats, in addition to a centerpiece. Younger children might need help cutting the more complicated shapes. Remember to supervise children as is appropriate during the cutting and gluing stages of any craft.
Salt dough clay could be used to create a one of a kind cornucopia. With a little patience, forming the horn isn’t very difficult. Start with a flattened piece of clay (use a rolling pin to flatten) and trace a circle using a plate. Cut out a wedge, so it can be curled around to make the horn. You can use a funnel to help hold the clay’s shape while it dries. Some types of clay can be dried in the oven. Once dry, paint the cornucopia tan. Then make the various fruits and vegetables that you want to fill the cornucopia, following the same drying procedure for the clay you are using. If you want the pieces to last longer, spray them with a clear sealant once the paint has dried completely.
A horn could also be made from paper mache’ by using a wire frame shaped like the horn. Some fruits and vegetables could be made over various size balloons. Again fresh or artificial produce could be used to fill the cornucopia as well.
With a little creativity, it does not take long to make a lovely cornucopia centerpiece for your table. Look around your house and you may find all you need already there. Saving some money is always something to be thankful for.
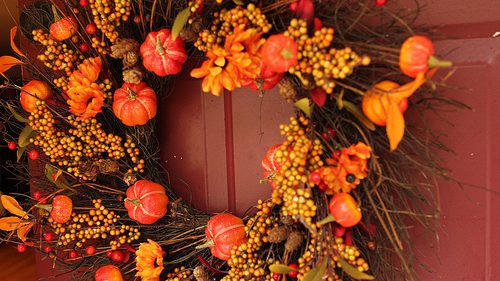
Thanksgiving Wreath
There is nothing more special than to hang a Thanksgiving wreath on your front door. It is inviting as well as pleasing to the eye. For this Thanksgiving, why not involve your entire family in the craft of making a Thanksgiving wreath? Here are some suggestions.
Having ventured out to various stores, Thanksgiving items are already being displayed. One store had a beautiful wreath made of grapevine with fall-colored leaves attached. Although the leaves were plastic, it was a simple, yet elegant wreath. The more one looked at it, the more it seemed it could be spruced up by adding additional items such as berries, nuts, or perhaps a small pumpkin in the center.
Another wreath was quite impressive. This one used the basic grapevine, but the leaves were freshly picked and dried, then glued to the vine. In addition, there were feathers and beautiful red and green checked fabric which was used to tie berry branches to the vine as well.
One wreath that was quite unique was made out of a large 8-1/2×11 picture frame. The leaves covered the outer part of the frame with berries and nuts placed within the leaves. The center, however, was the focal point of the wreath. A picture of a family with small text indicating three things they were thankful for on this special day.
Thanksgiving, after all, is a day of giving thanks and signifying not only the beauty of the holiday but one’s sentiments as well. A Thanksgiving wreath is not only a lovely way to express the holiday’s meaning, but a gift to share with family, friends, and neighbors as well.
There are so many different wreaths one can creatively and ingeniously make to celebrate Thanksgiving this year. Your local craft store has all of the items you need to create a wreath unlike any other. Remember to take pictures for your scrapbook as well. If the Thanksgiving craft in wreath-making has been a tradition in your home for years, then every picture taken is a reminder of how much love and attention you have given in designing a special wreath for your family.
Thanksgiving Placemats and Place Holders
A beautiful table setting is the finishing touch to a wonderful Thanksgiving meal. By collecting a few simple things from around the house, and maybe a trip to the craft or fabric store, you have the makings of a festive table. Standard placemats start with a rectangle of construction paper, or fabric, in fall colors or white and come in endless varieties, limited only by your imagination.
Handy Turkey Placemats
Trace around a hand, with fingers spread, to create a turkey. The palm is the body, the thumb is the head, and the other fingers are the tail feathers. Each child can make their own. It can turn into a game, to try to find their handprint at dinnertime, to see who sits where.
Fall Foliage Placemats
Collect colorful fall leaves from your own yard to make a lovely, natural placemat. You can also use artificial leaves from the craft store, if you prefer. Cut two rectangle pieces of contact paper the size you need. Arrange the leaves neatly on the first piece. Carefully place the second piece on top, pealing part of the paper backing off a little at a time, and press in place. Give the placemat a boarder by gluing strips of construction paper about an inch wide along the edges.
Pilgrims and Indians
Draw or find a pattern for simple silhouettes of Pilgrims and Indians. Place one of each on either side of the placemat. Decorate them, or leave them as simple silhouettes. Craft feathers could be added for details around the edges.
Burlap Placemats
If you want to go with a more rustic look, cut rectangles of burlap. If you have a sewing machine, stitch around the outside edge about an inch in, with a zigzag stitch, to keep it from raveling too far. Decorated the placemat with ribbon or yarn.
Fabric Placemats
There are many lovely fall prints available that could be made into placemats. They could be bordered with a nice ribbon (make sure it’s washable) for a simple placemat. The ribbon could be attached with fabric glue or double stick tape. Just be sure to use the permanent kind, if you want to wash them. Alternatively, you could make a quilted placemat and finish it off with binding, for a very elegant looking table.
Placeholders or place cards, can also be a nice touch at the dinner table. These help to eliminate the arguments of who sits where at dinner. They can be made by taking a piece of card stock, or heavy paper, about four inches square, folded in half. Print the name on both sides. If someone knows how to do calligraphy, that can add a nice touch. With all the interesting fonts available, it is easy to print out nice ones, and even add small graphics that fit the theme of the season right at your home computer.
Taking the time to create an attractive table adds a bit of color and fun to the festivities that will be enjoyed by everyone.
BONUS! Fun Family Thanksgiving Ideas
Thanksgiving is always a fun time of celebration and eating with your family. Here are some ways to make Thanksgiving even more fun for your family this year.
Thankful Cards
Make a card for each family member that will be your guest for Thanksgiving this year. On each card, tell that person what you love most about them, and why you are thankful for them.
Recipe Books
A few months before Thanksgiving, write a list of each family member. Beside their name, make a note of their best dish. Call each member and ask for a copy of that recipe, plus one or two of their own favorites that they’d like to share.
When you have all the recipes ready, compile them into a booklet and print them, using your computer and printer. (You can also use professional services, if you wish, to make a longer-lasting recipe book.) After your guests all arrive for your Thanksgiving dinner, give them each a copy of your special recipe book.
Mini Family Scrapbooks
Gather family pictures, if you don’t have many pictures, take them to a local copier and have extra prints made. Purchase mini scrapbooks at a scrapbook supply store, along with stickers, markers and various scrapbook supplies. Create miniature family scrapbooks, using one picture per page. Write what you are thankful for, in relation to each family member, on their designated pages. On Thanksgiving Day, give a copy of your mini family scrapbooks to each family member as a memento.
Photo by uyht 
 Fill out the form below to sign up to our free natural health and healing newsletter and stay up to date on our latest articles about holistic healing therapies and effective home remedies for common ailments. As a thank you for joining our newsletter, we’ll also send you